
Click to Skip Ahead
Cats are excellent groomers and should be able to take care of all their grooming needs themselves, right?
Wrong.
Just because your cat spends a hefty part of their day cleaning themselves doesn’t mean that you don’t need to step in and help out. Cats can’t get mats out of their fur or get rid of germs the same way a brush can, so you must have a good brush or comb on hand at all times. Regular brushings remove dander, dirt, and loose hair and keep your cat’s coat looking shiny and healthy.
An important part of the grooming process comes after you are done brushing your cat’s fur. Cleaning your grooming tools is essential, as it will remove any of the dander and dirt you brushed off your cat so his next grooming session with you can start fresh.
Keep reading to find our six simple steps for cleaning your cat brush or comb.

Before You Start
Before you begin the brush cleaning process, you should prepare your cleaning solution. The solution you use will depend on your personal preferences, but there are two main homemade variations, or you can invest in an all-purpose, pet friendly enzyme cleaner.
The first is a homemade cleaning solution using warm water and vinegar. You can decide between apple cider or white vinegar—whichever you have on hand will work just fine. You’ll want to mix equal parts warm water and the vinegar of your choosing.
The second solution you can use involves pet shampoo. You can make a mixture by squirting a few drops of the shampoo into a basin of warm water. Be sure you’re using pet-specific shampoo as the human variety is unsafe for pets.
The final option is an enzyme spray. These are specifically designed to combat the tough odors and stains that our cats may cause. Many are marketed towards accident clean ups but what’s better is that they are great for cleaning any products or items that your cat may come into direct contact with.
Our Favorite Enzyme Cleaner
The Hepper Advanced Bio-Enzyme Pet Stain & Odor Eliminator Spray is our favorite all-purpose enzyme cleaner. It kills harmful bacteria and permanently removes even the worst kitty stains and smells, leaving your home fresh and clean! Click here to learn more about this amazing product and get yourself a bottle.
| Image | Product | Details | ||
|---|---|---|---|---|
Best Enzyme Spray

|

|
Hepper Advanced Bio-Enzyme Pet Stain & Odor Eliminator Spray |
|
Check Price |
At Catster, we’ve admired Hepper for many years, and decided to take a controlling ownership interest so that we could benefit from the outstanding products of this cool cat company!
The 5 Steps on How to Clean a Cat Brush
1. Remove Any Excess Hair
The first step to cleaning your cat’s grooming brush or comb is to remove any of the hair that’s stuck in the bristles.
If you use a brush with bristles, you may need to use something small and pokey, such as a toothpick, to pull out any of the excess hair that’s embedded deep between the bristles.
Slicker brushes are much easier to remove the hair as they often have a pushing mechanism that helps push out the hair from the bristles.
If you have a molting comb, removing the hair will be even easier. Molting combs are the kind that professionals use to remove any loose or molted hair from cats and dogs.
Don’t worry if you can’t get every last piece of fur or dander from the brush. The next few steps should do the trick at removing those.

2. Apply Your Solution
Once the excess hair, dirt, and dander are removed from the brush or comb, submerge it in your cleaning solution. You can let the grooming instrument sit in the solution for anywhere between five and 30 minutes.
If your brush has a fabric pad, avoid soaking the entire brush head. Doing so can cause moisture to accumulate within the fabric and may eventually cause mold to grow.
3. Rinse
Once your cat hair brush or comb has sat in the solution for the appropriate amount of time, remove it and rinse. There still may be some residual hair or dander left on the brush at this point, but a good rinse with a strong spray will easily remove that.
4. Apply a Disinfecting Solution
Disinfecting your pet’s brush may seem like overkill, but it is an important step in the cleaning process, especially if you have a multi-pet household.
Although vinegar does have some antibacterial properties, it’s still important to apply a disinfectant to your pet’s brush to prevent any germs from spreading. There are plenty of pet-safe commercial disinfectants in aerosol or enzymatic forms you can find online or in your local pet store. If you prefer to DIY it, you can make a mixture of water and 10% bleach to achieve the same results.
5. Allow to Dry
The final step in the cleaning process is giving your grooming instruments space and time to dry. Place brushes with the bristle side down on a clean, dry towel to prevent any water from draining into the brush head and becoming a breeding place for mold.
Frequently Asked Questions
How Should I Store My Cat’s Brushes?
Once your cat grooming brushes and combs have dried, you need to protect your tools (and pets) by storing them properly.
Curious kitties don’t know the difference between a brush and their toys, so brushes left out in the open can quickly become chew toys. They need to be stored in a place well away from your cat’s reach.
Keep all grooming tools in a warm and dry area when you’re not using them. Cold temperatures can extend the lifespan of germs and wet areas, like bathrooms, can make mold grow faster.

How Often Should I Brush My Cat?
The answer to this question depends on a few different factors.
The length of your cat’s hair is perhaps the biggest determinant. Long-haired cats will shed more than cats with short hair, but even short-haired breeds can shed. Even if you find your long-haired kitty isn’t much of a shedder, brushing is important to prevent any painful mats or tangles.
The time of year can also be a deciding factor in how often you should brush your pet. Short-haired cats tend to go through shedding seasons depending on the length of daylight. Cats without much access to natural lighting can shed all year round, but most pet owners report seeing an increase in shedding when winter ends and when summer begins.
Your pet’s age can determine how often they need brushing. Senior cats may be more prone to joint issues and arthritis, which can make taking care of their grooming difficult. If you notice your older cat’s fur starting to look a little shabby, you might need to make your regular brushings even more regular.
So, how often should you brush your cat? Aim for at least once a week, but this isn’t a hard and fast rule. If your cat looks like they need to be brushed more often, don’t be afraid to pick up the brush and get down to business.
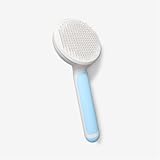
If you are looking for recommendations on the best cat brush, you should check out Hepper Cat Brush. You will hardly find different brush with so many pros - easy to clean, easy to use, durable and effective. Simply everything you need from a cat brush. Click here to order yours today.
How Often Do I Need to Clean My Cat’s Hair Brushes?
If you only have one cat, you can get away with fewer brush cleanings. You might only do it once you notice the fur and dander beginning to collect on the brush.
If you have a multi-cat household, you should clean and disinfect the brush between cats. Never brush one kitty and move on to the next, especially if you have outdoor cats. You don’t know what germs your kitty could be harboring in his fur, and you don’t want to pass any of those germs from cat to cat.
If you have a single outdoor cat, you might need to clean their grooming tools more often. Outdoor kitties tend to get themselves into, well, everything, and you don’t want last week’s dirt and germs staying on your brushes for too long.

At Catster, we’ve admired Hepper for many years and decided to take a controlling ownership interest so that we could benefit from the outstanding products of this cool cat company!
Final Thoughts
If you want your cat’s coat to continue looking its absolute best, you need to make sure that brush cleaning becomes a regular part of your routine. It only takes a few minutes and can mean the difference between a clean cat with a shiny coat and a cat that’s covered in last week’s dirt and dander.
Featured Image Credit: RJ22, Shutterstock


